


https://driversofsecondlife.blogspot.com/2022/01/how-to-obtain-and-use-navigation-hud.html
 |
| NavHUD |
All current and past NavHUD's can be obtained in-world at the DSL World Headquarters aka "HQ" here via the archives and are released via the Notices of the Drivers of SL group info page and is usually announced in the group chat within the day/hour.
You can either click on the Award on top of the filing cabinet to get the current single navHUD or click on the cabinet to get a month of navHUD drives in a folder of your choice.
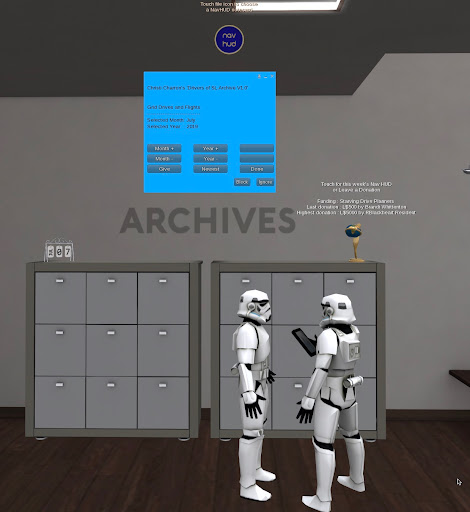 |
| Archives at HQ |
 |
| Check DSL Group Notices |
Once you obtain your NavHUD you are free to complete the drive when you want to. In-world group notices last two weeks before being automagically deleted from group notices.
Note: Older DSL NavHUD's may or may not work properly because route locations and objects on the drive/grid may have changed or are no longer available. Rewards also may or may not be available on older drives.
Once you obtain your NavHUD you then wear/add. The navHUD will give you written directions on top of the hud and also in your Local Chat window.
The NavHUD will also give you Audio directions, so if you have not already done so, turn up your sound so you can hear the directions as well while you are driving.
Please follow the Nav HUD directions given to you before you start asking questions in the DSL group chat. If all else fails, feel free to ask in the DSL Group Chat for help. Most likely there will be a lot of Drivers more than happy to assist you. Go Team :-)
The number one thing about the grid drive is to have patience. Let the NavHud load until it tells you it's ready in the Local Chat window.
Navigation HUD Features
Reroute : Re routes your route if you have not completed your route.
| Reroute Symbol |
Expand/Contract HUD : Opens and closes the NavHud to optional choices.
 |
| Expand / Contract HUD |
Map to Next Rez Area : If you need a rez area, press and hold the green diamond with a yellow arrow and it will take you to the next closest rez area forward on the route.
 |
| Map to Next Rez Area |
Redeliver Items : This will re-deliver items along the route you might have missed including the final reward.
 |
| Redeliver Items |
Autopilot: If you are standing, running or flying, this will make your avatar walk, run or fly the leg you are on.
 |
| Autopilot |
Load New Route Notecard : Loads a blue button menu to choose a new leg.
 |
| Load New Route Notecard |
 |
| Load Legs |
Jump to Next Leg : Loads the next leg and then shows you its starting location on the map, so that you can then TP there if you choose to. It may come with a warning.
 |
| Jump to Next Leg |
Help Icon: (Click on the Question Mark) -> ( ? )
States:
"Hello, Congratulations, you are in possession of a Drivers of SL 'NavHUD!'
To reach your pre-programmed destination, just move in a direction that will keep the guidance circle's pointer up at 12-o-clock.
The directional guidance circle is green when you are facing your next waypoint, and will turn to yellow, then eventually red, as you face further away from that goal.
Touch the circle to expand the HUD to display a wide set of drive-time options.
Along the way you may receive guidance and cautions about upcoming rez areas, fuel pumps, narrow roads or channels, turn directions and angles, etc.
Click on the barely legible little orange and black arrow sign if you are lost. You will be re-routed and happily on your way again.
Click on the small icon with the arrow pointing to the green diamond to bring up a map that will show you the next rez area, with an option to teleport there.
Click on the cardboard box with an outgoing arrow to get things redelivered to you if you lost a given item or failed to accept it when offered.
Click on the steering wheel to be auto-piloted during the navigation phase of the current leg.
Click on the box labelled 'next leg' if you are hopelessly stuck on either the navigation or quest phase of a driving tour leg.
To repeat this help at any time, click the little question mark icon you see near the directional guidance circle.
Sent to you is a texture explaining how to use most of the NavHUD features.
Finally, just printed in your chat window is a link you can click to teleport directly to the start of the route.
Thank you for using the NavHUD!
Click this to teleport to the starting point: Teleport to...(the starting point)"

